Pot It Like It's Hot
Winter sowing is a germination method where one starts seeds outdoors in containers. It is a low-energy method of growing unique varieties of plants without taking up space to start seeds indoors. It also allows you to go on vacation over the holidays without worrying whether your plants will survive!
HOW DOES IT WORK?
Seeds have built in germination timers. Although this method starts in late December, the seeds will wait patiently, even if you don’t, until the temperature indicates it is time to germinate. Seeds such as lettuce and brassicas (broccoli, kale, collard greens) will be some of the first plants to germinate whereas others, such as paw paw trees, may not germinate until late spring.
Once the container is prepped and the seeds are planted, the containers will remain outside throughout the winter or spring until they are ready to be planted.
CHOOSING SEEDS
Almost any plants you can grow from seed can be winter sown. This includes both annuals and perennials, trees, shrubs, vines and vegetables. Keep in mind tropical plants that germinate early due to unseasonably warm temps may not survive. Your zone and microclimate may provide different results from others practicing the same method, so I recommend experimenting if there is something you would like to try. Seeds that require pre-chilling are a great choice for this method. They will receive chill hours while living outside all winter. Our native trees fall into this category.
MATERIALS LIST
- Potting soil like Pro-Mix Organic; Soils to not use include moisturecontrol soil, seed-starting mixes with zero nutrients (coconut coir or peat moss) and topsoil.
- Duct tape
- Paint pen or marker
- Plastic plant tags
- Drill with ¼-inch bit OR glue gun (burns holes in the plastic)
- Box cutter
- Containers: Any clear or opaque containers (ask local restaurants or coffeehouses for used milk jugs)
- Seeds of your choice
- Liquid organic fertilizer with low N-P-K ratio like Neptune’s Harvest Fish Emulsion
THEY’RE GROWING! NOW WHAT?
Check your soil periodically. Do not let your soil dry out. This will require checking on your plants a couple times a week once the weather warms up in the spring. Once they have their first true leaves, water with a weakened fertilizer.
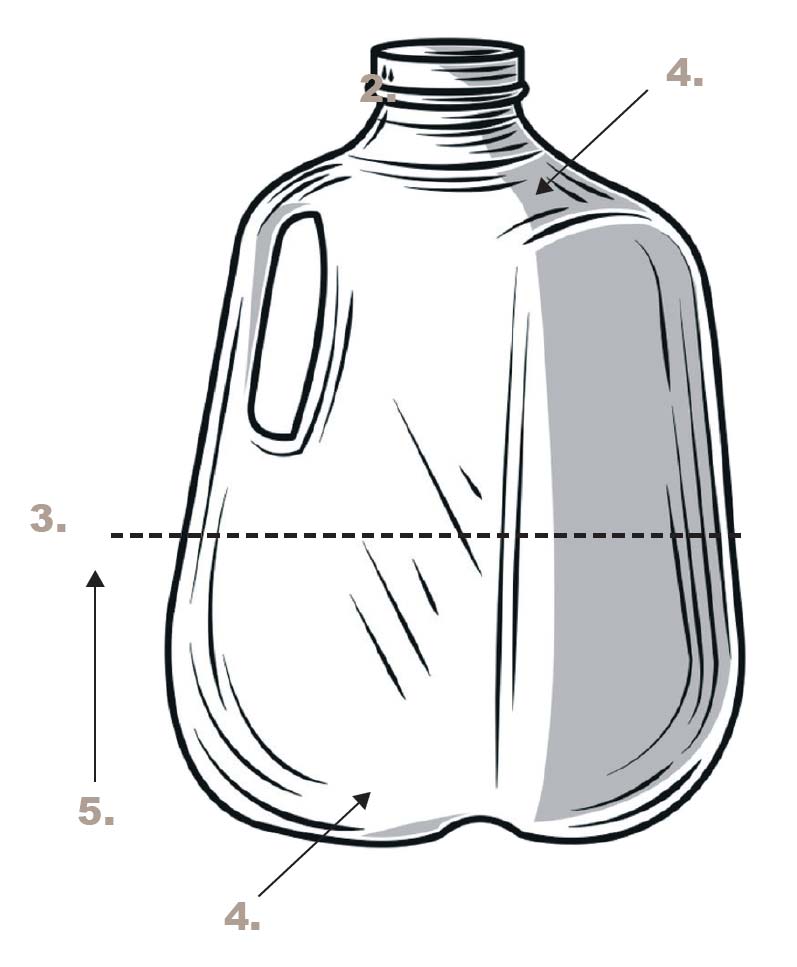
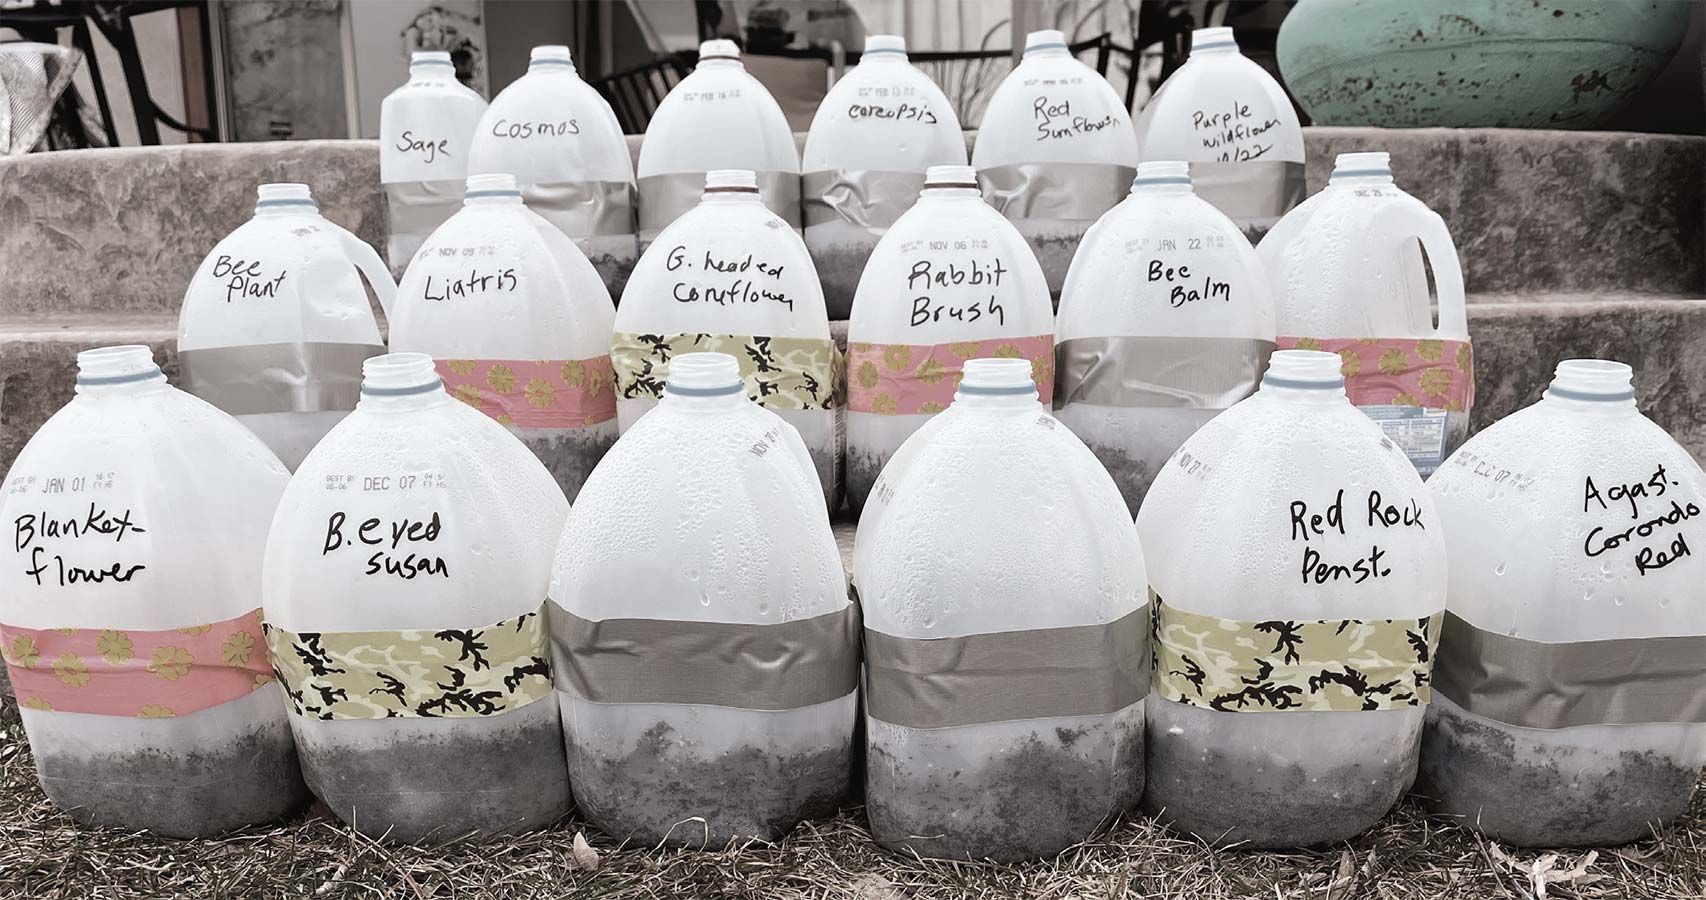
STEPS TO GET STARTED
- Select an opaque or clear container such as a gallon water or milk jug.
- Remove and discard the cap.
- Make a cut all the way around the jug without cutting the handle.
- Use a drill or glue gun to make 5–6 ¼-inch holes in the bottom and top of the container.
- Add potting soil without moisture control to just below the cut.
- Water until the soil is moist.
- Sow seeds in the container according to the seed packet instructions.
- Write variety and date sown on the outside of the container.
- Include a plant marker in the dirt with the same information as above.
- Use duct tape to close the container where the cut was made.
- Place in a sunny spot in your yard protected from pets and high winds.
Q&A
Do I need to do anything with the containers during the winter?
Not typically, except in the case of a dry winter. If soil looks dry, water by inserting the nozzle of a spray bottle into the opening of the jug.
When do I open the container?
Open the container once the plants reach the top or when the temperature is 50° or higher.
When should I fertilize?
Fertilize in late March or early April once the plants have their first “true” leaves.
How do I separate the plants?
Depending on the plant, you can gently separate or simply cut out chunks with a knife and plant them.
Should they be in full sun?
Yes.
How much potting soil should I use?
Add soil to a depth of 4 inches and mix in a little compost.
TROUBLESHOOTING
Green on top of the soil caused by a wet environment. Do nothing.
Plants are not germinating. Do nothing. As long as the soil isn’t dry, they will germinate when they are ready.
Warm-weather plants germinated too early. Do nothing. Employ survival-of-the-fittest mentality or start another jug if you are really worried.
Water not draining/too much water. Drainage holes are clogged, there are not enough holes (aim for 5), or they are too small. Enlarge the holes or add more.
Plants are yellowed. Spray them with the liquid fish emulsion diluted to ¼ strength.
P&P
Peaceful & Practical Edible Gardens was born from the combined love of gardening, food and design.
Founded by Lynsey Johnston, P&P reimagines how we source our food, while maintaining beautiful and bountiful landscapes. Lynsey is fascinated by the possibility that food can grow anywhere, that a few seeds can provide enough food for multiple families and that a deeper understanding of plants and nature has the power to change our lives.
P&P is active in the community, teaching folks how to responsibly create and care for their gardens, build spaces and grow healthy food. They have a keen focus on caring for the earth, centering ethical principles of permaculture and educating the community. P&P works with home gardeners and community gardens in the Indianapolis area, and serves clients on a national scale through virtual support. Their services include edible garden design, installation and maintenance, and workshops and coaching.
Do you want to reconnect with nature and redesign your space, while growing your own healthy food?
- Learn more at PeacefulAndPracticalEdibleGardens.com
- Follow on Instagram @peacefulpracticalediblegardens